Why Not...
MY BLOG SPACE
 Living Room Before Living Room Before This past week I was called in for an emergency. A Mother called one of my clients, in a panic...they were going to do an inspection on her apartment. My client called me in a panic! She explained that she hadn't been in her Mother's apartment in years, always using the community room in her building instead of her apartment. Therefore, she had no idea what she was asking of us, but she knew it had to be bad since her Mother was worried about not passing the inspection. We showed up at the apartment, knocked on the door and the door slowly opened the door and blocked our entrance. She was embarrassed and unsure if she was ready to let someone see her shame. She asked..."How bad have you seen a house?" I reassured her that it would be ok and we were there to help her out. As a cleaner, it is our job to put fears to rest and not judge! We are there to do a job for a client and be professional and ready for anything so that if you run into something you are not expecting, you can easily overcome the challenge!  Bedroom Before Bedroom Before She opened the door reluctantly and lead us down the hallway into the main living areas. She sighed and said she was so sorry, repeating over and over..."I'm so embarrassed." Again, not Judging, we looked through the apartment, with confidence that we were perfect for this job! I told her it was going to be ok and we were here to help her. We cleaned...and cleaned...and 4 hours later, with two of us, we completed what we could in the clients budget. Thirteen bags of garbage later, signs of mice and dead maggots in the carpet, we got the place in shape to pass the inspection. As we wrapped up the job, I talked to the client and told her it would be just fine and she was on the right track. Her eyes filled with tears with relief and happiness with the hope of a new beginning. I gave her a hug and let her know that she did a great job. Our job, as home cleaners is also to be kind, understanding and not judge a person. There are always stories in a clients life we don't know but if you open your heart and mind to see the bigger picture, judging won't get in your way of doing a great job!  Living Room After Living Room After TIP: When you feel overwhelmed in a situation like this, here are a few ideas to help out. ~Before you begin, walk through the house. ~Talk to the client and find out which rooms are most important to get cleaned. ~Be honest with them about what you think you can get done in the allotted time. ~Dig in...Don't let ADD get in the way. Stay focused on one area in the room and start working your way around the room. ~Be aware of your surroundings...watch for broken glass, knifes, sharp objects hidden in the clutter. ~If you client is working with you, check in with them. Make sure they feel comfortable with the progress. ORGANIZING TIP: Moving stuff from a cluttered mess to piles around the room doesn't help you see progress. This is a trick I have learned and makes it easier to leave homework for your client without overwhelming them. You will need: ~Brown Grocery Bags ~Scissors ~Black Marker  Bedroom After Bedroom After As you go through the clutter, create bags of items...bathroom items, hair clips/headbands/brushes, office supplies, dirty dishes, important papers, etc. Label bags with appropriate titles. For bags that have smaller stuff in them, I cut down so you can easily see into them.
Once you have cleared the clutter and done with the job, instruct your client to work on one bag every day. This makes it much less overwhelming for them. ~Make sure to give them guidelines for throwing things away...broken, unused, old, outdated, etc. Note: This cleaning ended with the apartment clean for the client. Unfortunately, there were a few things we couldn't fix or get to. The carpet was destroyed in the living room near the couch and will need to be replaced. The pile of clothing on the clients bed is being gone through by the Mother and Daughter, since the client had lost 60lbs from illness, much of the clothing was thrown or donated.
0 Comments
9/8/2013 1 Comment Cleaning A Bathroom Cleaning a bathroom sounds so simple but there are several steps to keep your bathroom in tip top shape that get missed most of the time. I clean, on the average week about 20 bathrooms! I have lots of practice! Do you know why bathrooms get so dusty? Toilet Paper is the culprit! We behinds are sensitive and so we like the soft, fluffy toilet paper...but that creates lots of dust! Then it gets wet and melts onto everything...the towel and toilet paper holders, walls, sinks, mirrors and even the lights. 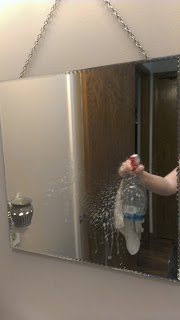 Here are some quick tips to get the bathroom sparkling clean without much time! You will need: Bleach spray Window cleaner Comet spray cleaner Ajax White cloth, microfiber cloth & a body poof scrubber (the cheap ones) Toilet brush Small scrub brush Poly duster (easiest to wash out) Pumice stone (for hard water rings and rust stains) 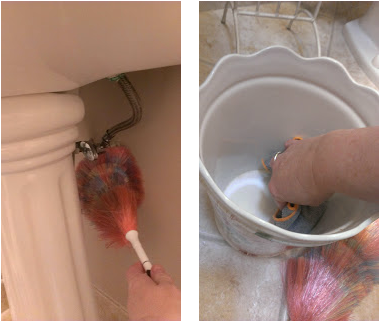 Fact: Most bathrooms take 15-20 minutes to clean if they are not in bad shape. Tip: Use a poly duster for all your dusting.(found at most home repair stores...I get mine at Menards for $2.00) I clean them out as often as needed, usually almost every room. To clean them, run them under a tub faucet to remove dust and dirt. Then place the handle between your palms and roll it back and forth to spin the excess water out of it. 1. Dust everything...start from high and work down. If light fixtures need a good dusting, grab a chair and polish them up! I used my duster to remove some of the loose dust from behind the sinks and toilets too. 2. Empty garbage can and wipe it out with a damp cloth. 3. Spray the sink, toilet and tub edges that have mold with bleach spray. 4. Spray Comet spray on vertical walls of shower to cut through soap scum. 5. While the bleach and Comet are working, spray your mirror and wipe it clean with a white cloth. Sink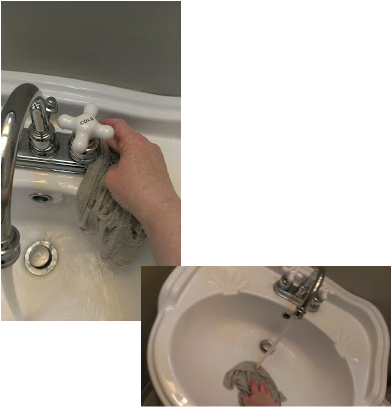 First of all...Put EVERYTHING away! To clean a sink, let the bleach spray work its magic and if there are water spots and soap scum use the Comet spray. ~ Get the white cloth you used on the mirror wet and start washing around the faucet, making sure to get behind the faucet really well. ~ Now dry the faucet and sink edges with the microfiber cloth. ~ Use the small scrub brush to get around the edges of the drain. ~ If your drain plug comes out, pull it out and clean the mold off of it. Cabinets and Woodwork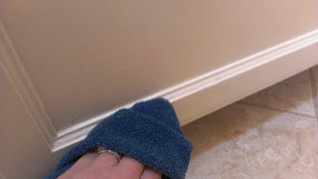 Most people don't think about the cabinets and other fixtures but they get just as dusty and dirty as the rest of the bathroom. ~ Use your white cloth to get along the molding of cabinet fronts and remove any toothpaste or soap marks from the cabinet. ~ Wipe all the towel and toilet paper fixtures down then dry them off. ~ LIGHT SWITCHES and DOOR HANDLES!!!! Shower/Bathtub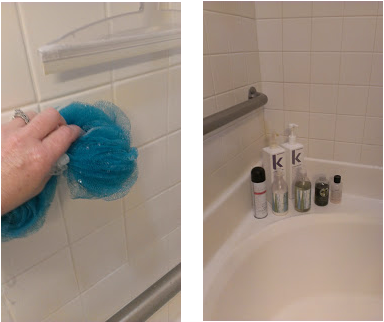 Now that your cleaning products have had a chance to work it's time to add a little elbow grease! ~ Use your white cloth and run along the top edges of the shower to get dust that has collected there. ~ Grab the body poof scrubber and scrub the shower enclosure starting at the top and working down. ~ Make sure to get under all the bottles and wipe the bottles themselves before putting back. ~ If the tub itself has a oily film, shake on some Ajax and then use your scrubby to remove the soap scum. ~ Do a final rinse and wipe down the tub edges. Tip: If you have a tub with jets, fill just past the jets and pour a cup of bleach into it and let the jets run. It will kill any mold built up within the jets. Toilet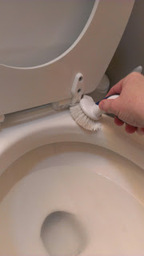 Make sure to scrub around the hinges on the toilet with your small scrub brush and then use your toilet brush to get it nice and clean! ~ If you have hard water or rust stains, use the pumice stone to buff them away. ~ Flush...and it's clean. ~ Use your white cloth to wipe behind the toilet and around the sides of the toilet and bolt areas. Tip: Always dry after you have wiped the toilet down or you will have streaks. FloorsUse a white cloth to wipe up the floors. Make sure you have gotten behind the toilet, sink and door and in every corner. Final Touches ~ Fold towels neatly and make sure they match! I always love having matching towels. ~ Wipe down any other items that are remaining on the counter such as perfume bottles, mirrors, canisters, cups and toothbrush holders. Here is a before and after photo of the bathroom...  Before and After 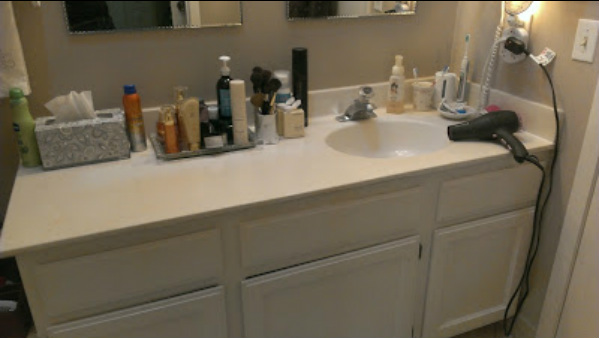 Before 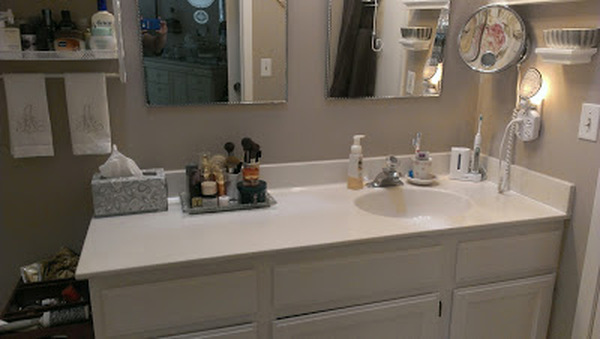 After What a difference it makes to put things away and polish up everything!
|
AuthorWho am I? What do I want to be when I grow up? Hmmm...Let me sum up myself as a Creative, Inspiring Artist, Fabulous, Rockin' House Cleaning Business Woman, a Fun-Loving Mom and Loving New Wife! Archives
February 2014
Categories |
 RSS Feed